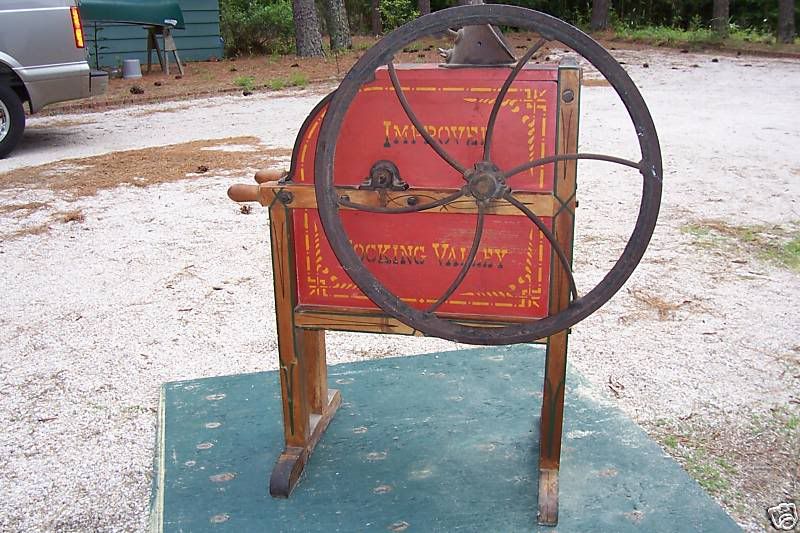
Post by wdkits1 on May 16, 2010 8:04:44 GMT -6
When I first took on this project I was going to use white oak for the woodwork, but after talking to the owner and getting permission to also do the original paint job I decided to go with the materials that were used in the original—maple for the frame and poplar for the box. After sizing all of the frame components to 1 3/4” x 2 1/8” and cutting to the proper lengths I began with turning the 2 small handles.

There are a lot of mortise and tenon joints used to hold the frame together so I went ahead and set up a tenoning jig to use on the bandsaw. Very simple set-up really. Making absolutely sure that the blade is set to true 90 degrees to the table is critical to using this jig to make tenons. I started by making a small sled that rides in the miter slot which is used to guide the work piece through the blade for the shoulder cuts and an adjustable clamp- on block to use as a reference point for the length of the tenons. I also made a stop block that clamps to the fence that is used to get the depth of the cut. After making a sample tenon to use as a reference I can now set the fence with the stop block and cut all of the tenons to the right depth.

Here is the set-up for cutting the shoulders.


Perfect every time

After all of the tenons were cut and all of the mortises were drilled and chiseled I drilled all of the hardware mounting holes, and did all of the rabbeting on the router table using the original pieces of the frame as a reference.
Here are all of the pieces for the frame.

Here is the dry fit frame

Here is the frame with most of the mechanical pieces set in place.

On to the parts for the box for the Hocking Valley Corn Sheller.

There are a lot of mortise and tenon joints used to hold the frame together so I went ahead and set up a tenoning jig to use on the bandsaw. Very simple set-up really. Making absolutely sure that the blade is set to true 90 degrees to the table is critical to using this jig to make tenons. I started by making a small sled that rides in the miter slot which is used to guide the work piece through the blade for the shoulder cuts and an adjustable clamp- on block to use as a reference point for the length of the tenons. I also made a stop block that clamps to the fence that is used to get the depth of the cut. After making a sample tenon to use as a reference I can now set the fence with the stop block and cut all of the tenons to the right depth.

Here is the set-up for cutting the shoulders.


Perfect every time

After all of the tenons were cut and all of the mortises were drilled and chiseled I drilled all of the hardware mounting holes, and did all of the rabbeting on the router table using the original pieces of the frame as a reference.
Here are all of the pieces for the frame.

Here is the dry fit frame

Here is the frame with most of the mechanical pieces set in place.

On to the parts for the box for the Hocking Valley Corn Sheller.


